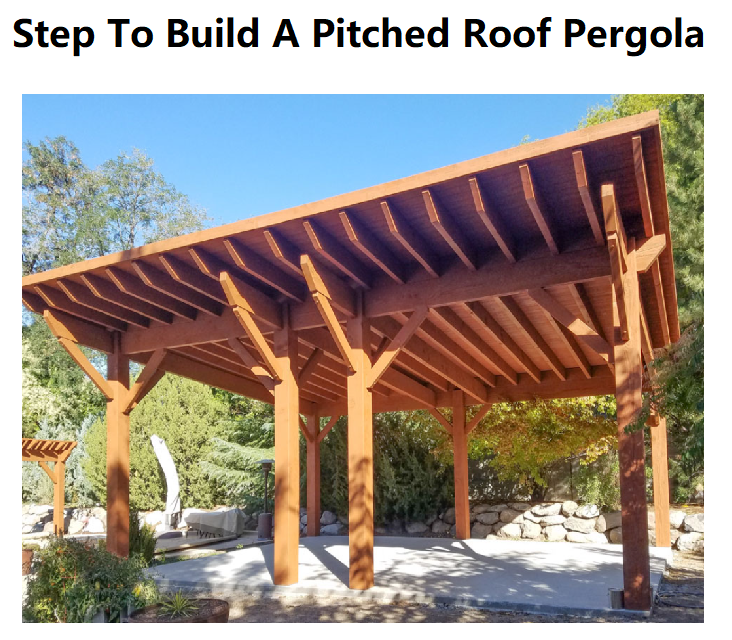
A pitched roof pergola is a stylish and functional addition to any outdoor space. This guide will walk you through the process of building one, step-by-step, with clear instructions and helpful tips. Whether you're a seasoned DIY enthusiast or a beginner, this project can be completed with the right tools and materials.
Tools and Materials You'll Need
Before starting, gather the necessary tools and materials to ensure a smooth construction process.
Tools:
- Tape measure
- Circular saw
- Drill and bits
- Hammer
- Spirit level
- Ladder
- Post hole digger
Materials:
- Timber for posts, beams, and rafters
- Roofing material (corrugated sheets, shingles, or tiles)
- Concrete mix
- Bolts, screws, and nails
- Brackets or hangers for roof support
- Weatherproof sealant or stain
1. Design Your Pergola
Start by designing your pergola. Decide on the dimensions, roof pitch, and materials. A common roof pitch is 4:12, meaning the roof rises 4 inches for every 12 inches of horizontal run. Create a detailed plan to guide the construction process.
2. Select and Prepare the Site
Choose a flat, level area for your pergola. Mark the positions for the posts based on your plan, ensuring they are evenly spaced and aligned. Clear the site of debris and obstacles.
3. Install the Posts
Secure the posts to form the foundation of your pergola.
- Dig Post Holes: Use a post hole digger to create holes 24–36 inches deep, depending on your region's frost line and the pergola's size.
- Set Posts: Place a post in each hole and ensure it is level. Pour concrete around each post and allow it to set for at least 24 hours.
4. Attach Horizontal Beams
Fix horizontal beams to the top of the posts using bolts or screws. Ensure the beams are level, as they will support the roof structure.
5. Build the Roof Frame
- Install Rafters: Cut rafters to match your roof pitch and attach them to the horizontal beams. Space the rafters evenly for structural integrity.
- Add a Ridge Beam: For extra support, install a ridge beam along the roof's apex.
Secure the rafters and beams using metal brackets or hangers for added stability.
6. Add Roofing Material
Choose a roofing material that complements your outdoor space and climate. Attach the roofing material to the rafters:
- Start at the bottom edge and work upwards.
- Overlap sections to prevent water leakage.
- Secure the material with screws or nails.
7. Finishing Touches
- Trim Excess Wood: Cut any overhanging beams or rafters for a clean, polished look.
- Seal and Stain: Apply weatherproof sealant or wood stain to protect the pergola from the elements.
- Decorate: Add lighting, climbing plants, or curtains to enhance the pergola's aesthetics.
Tips for Success
- Prioritize safety by using proper protective gear and ensuring tools are secure.
- Check local building codes and regulations before starting construction.
- Double-check measurements for accuracy during the build process.
 Home
Home
 Back
Back
